

Overview
Slide Decks turns a short request, an outline, or your uploaded material into a complete presentation. The super agent can research the topic, organize the story, write the slides, choose a visual style, and add supporting visuals. After the first version is ready, you can keep improving it in three ways:- Ask the super agent to make broad changes across the deck
- Point to specific elements and leave precise change requests
- Directly adjust text, media, properties, size, and position in the preview
Create your first slide deck
1
Start a slide deck
In a chat, type
/slide or /slides, followed by what you want to present. You can also open the + menu and select Create slide deck.2
Add useful context
Include the audience, purpose, preferred length, tone, and anything that must appear. Attach reports, notes, images, or video files if the deck should use them.
3
Choose a visual style
If the super agent shows theme choices, pick the one that best fits your audience. It may ask a few short questions when an important detail is missing.
4
Wait for the finished deck
The super agent writes, checks, and renders the presentation. A deck card appears in the chat when the first saved version is ready.
5
Open or download it
Select Open to review and present the deck. You can also download an available format directly from the deck card.
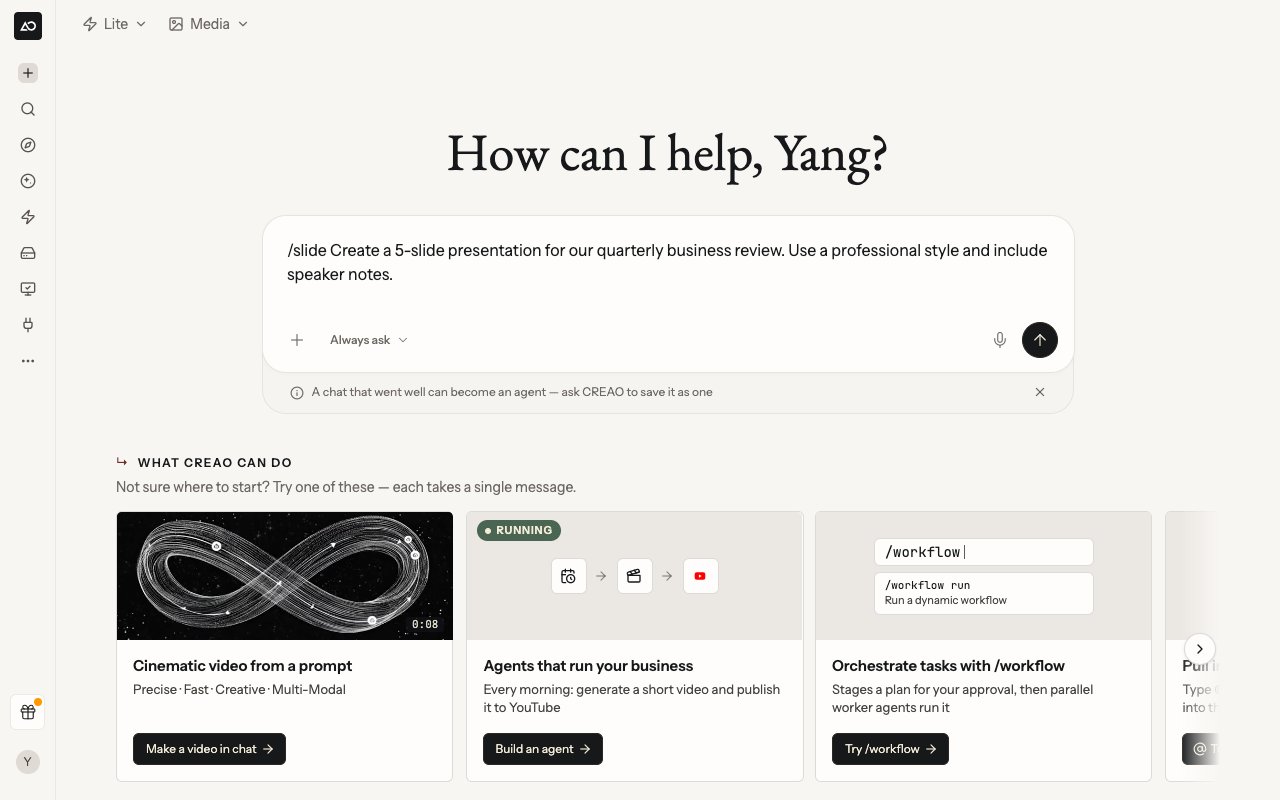
Start with a short request that names the audience, purpose, and any must-have content
Preview and present
Select Open on the deck card to enter the preview. From there, you can:- Move between slides with the arrow buttons or keyboard arrow keys
- Select the page counter to jump to a slide
- Switch between the fast slide-image view and the live presentation
- Open Full screen when presenting
- Show or hide Speaker notes
- Select the Revision label to see saved versions
- Select Request changes to enter annotation mode
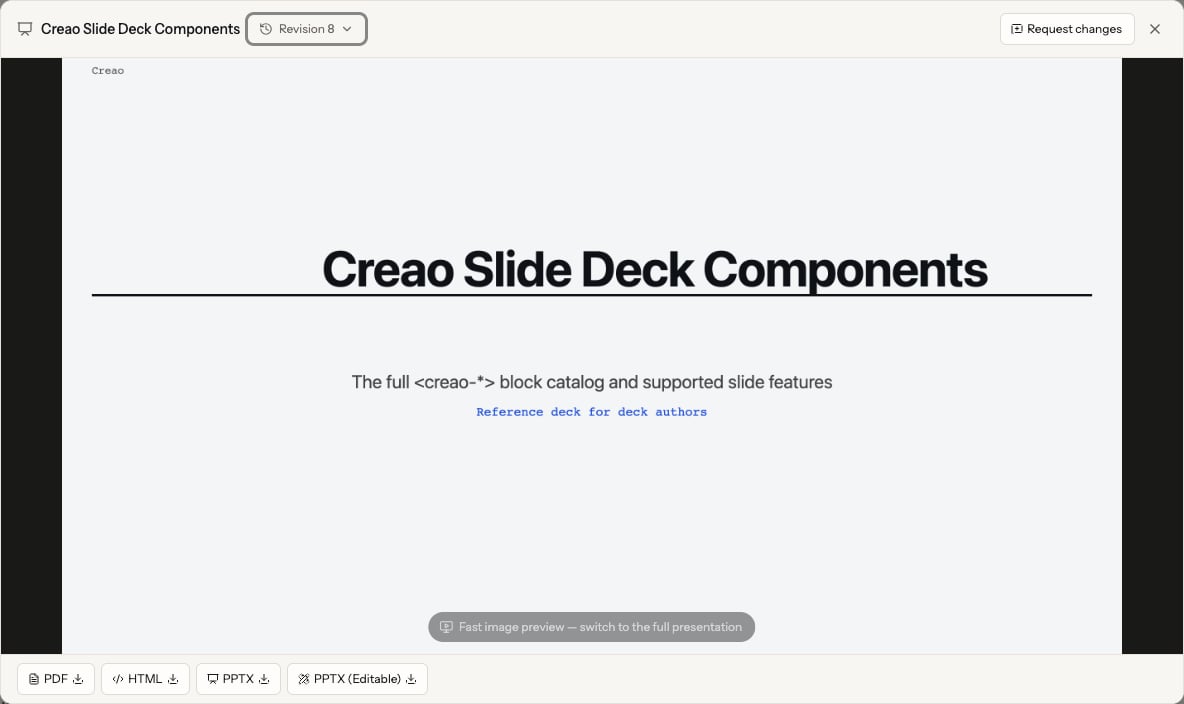
The preview keeps presentation controls, speaker notes, versions, editing, and downloads in one place
Download a slide deck
Download buttons appear on the deck card and along the bottom of the preview. The available formats may include:
If the editable file has not been prepared yet, select Get Editable PPTX. You can leave while it is being prepared and return later to download it.
Videos play in the HTML presentation. PDF and PPTX downloads show the video’s poster image or a still frame instead. Static downloads also show all step-by-step content at once.
What a slide deck can include
The super agent chooses the right mix for your story. You can also request any of these items directly.
You can ask for a specific layout in everyday language, for example: “Put the comparison in two columns,” “Make this a full-screen image slide,” or “Turn the milestones into a timeline.”
Edit a slide deck
Choose the editing method that matches the size of the change.Ask the super agent in chat
Reply in the same chat and describe the result you want. This is the simplest option for changes that affect the whole deck or require judgment.Request changes on specific elements
Annotation mode is the main path for precise visual feedback. It lets you point to the exact item you mean instead of describing its location in chat.1
Open annotation mode
Open the deck preview and select Request changes.
2
Select an element
Select the text, image, chart, shape, or other element you want to change. Selecting an element does not create a request until you add one.
3
Write the request
In Ask the agent, describe the desired result, then select Apply. For example: “Make this chart easier to read and emphasize the 2026 result.”
4
Mark up more elements
Select other elements and add more requests. You can also add a request for the whole slide or attach a reference file to a request.
5
Send the batch
Select Submit when the count includes everything you want to send. All requests are sent together, and the super agent applies them to a new version.
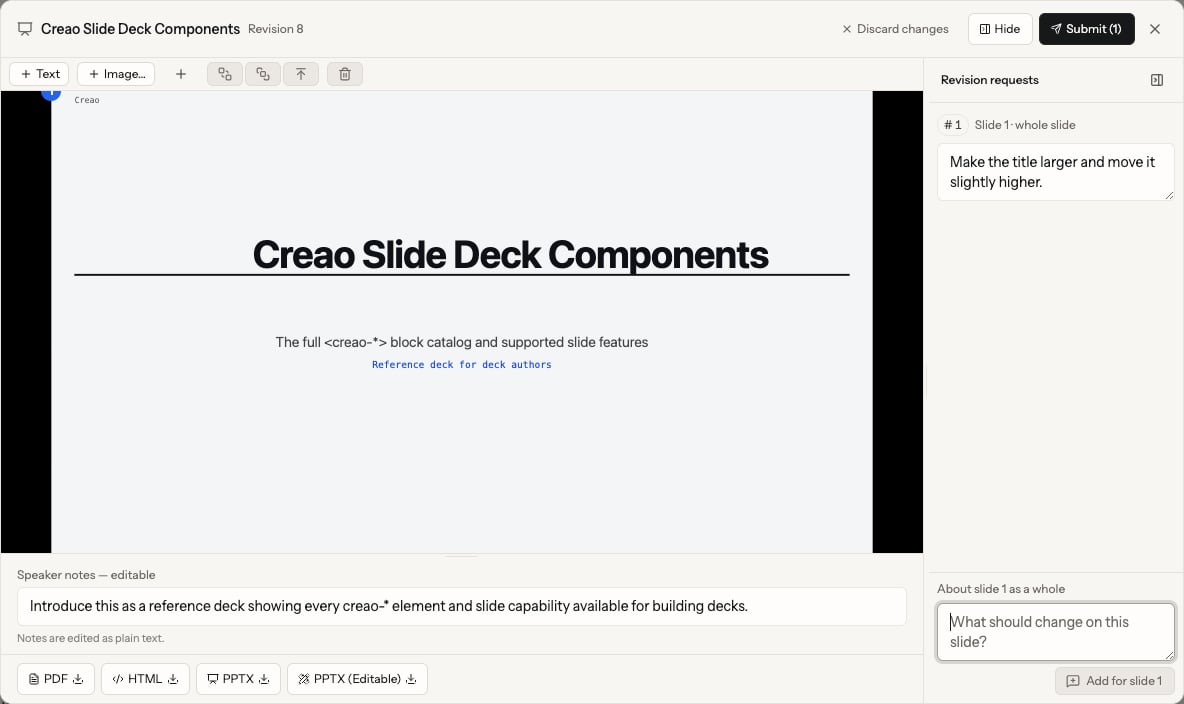
Collect several changes and send the complete batch with Submit
Adjust an element directly
Use direct adjustment when you know the exact change and do not need the super agent to interpret it.1
Open the element editor
In annotation mode, select an element and open Adjust directly. You can also double-click an element to move from Ask the agent to its direct controls.
2
Make the change
Depending on the element, you can edit text, numbers, chart data, formulas, diagram content, colors, alignment, image or video files, playback options, and other properties.
3
Apply it
Select Apply. The change is added to the current batch and reflected in the preview.
4
Save the batch
Select Submit to save the direct edits as a new version. When they can be saved directly, a batch containing only direct edits does not start another super-agent run.
- Drag an element to move it, or use the arrow keys for smaller adjustments
- Drag its handles to resize it
- Use + Text or + Image, or open the top
+menu for the full set of insertable elements - Select an item from the insert menu, then drag a box on the slide to place it; images and videos ask you to choose the file first
- Move an item forward or backward when objects overlap
- Edit notes in the Speaker notes — editable panel, then use Undo edit if needed
Combine direct edits with agent requests
Direct adjustments and annotations work well together. For example:- Insert an image or text block and drag a box where it should go.
- Move or resize it until the position is roughly right.
- Select it and write: “Align this with the title, give the text more room, and make the spacing match the rest of the slide.”
- Select Apply, add any other requests, then select Submit.
Work with saved versions
CREAO records each completed agent revision and each successfully submitted set of direct edits as a new version. Annotation requests that need the super agent create another version when the agent finishes them. Earlier versions stay available, so a later edit does not overwrite the history.1
Open the version list
In the preview header, select the Revision label. The Versions panel opens.
2
Choose a version
Select an available version to preview it. Each entry shows when it was created and whether it came from the agent, direct editing, or annotation mode.
3
Return to the latest version before editing
If the preview shows Outdated, switch to the newest version before making more changes. This avoids building new work on an older copy.
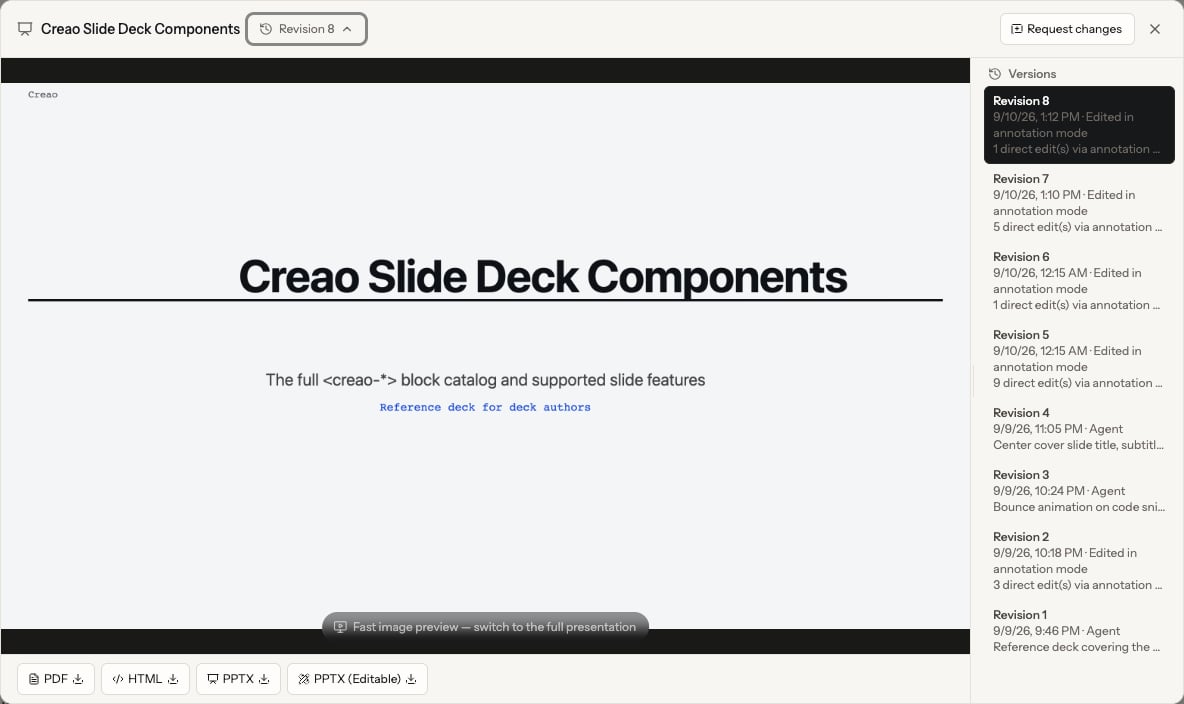
Open the Revision label to inspect who created each saved version and when
Versions let you inspect and download earlier work. There is no separate one-click restore action, so return to the newest version before continuing to edit.
Common scenarios
Turn a report into an executive presentation
Attach the report and tell the super agent who will see the deck, what decision they need to make, and which findings matter most.Build a pitch or proposal from an outline
Paste the outline or attach your notes. Name the audience and desired next step so the deck has a clear argument rather than simply repeating the source.Create a data update or QBR
State the reporting period and the three most important conclusions. Ask for “conclusions first, charts instead of long paragraphs, and clear actions at the end.”Use your own images or video
Attach the files when you create the deck, or add them later from Adjust directly. Tell the super agent which slide or message each asset supports.Add or improve speaker notes
Ask the super agent to write notes for the whole deck, or open annotation mode and edit one slide’s notes directly.Refresh an existing deck
Ask the super agent to update facts, simplify the story, translate the copy, or apply a new direction. Mention what must stay unchanged.Fix one visual detail
Use annotation mode, select the element, and describe the intended relationship instead of only saying “move it.”Tips for better results
- Name the audience and the decision, feeling, or action the deck should create.
- State a slide count only when you have a real limit. Otherwise, let the super agent choose a length that fits the material.
- Attach the source material and say what is authoritative.
- Call out must-keep facts, quotes, images, brand colors, or wording.
- Ask for speaker notes when someone will present the deck live.
- For precise feedback, select the element in annotation mode instead of describing “the box on the right.”
- Review the live HTML presentation before an important meeting if the deck uses video or reveals.
- Download a PDF as a stable sharing copy, even if you also plan to edit the PPTX.
Good to know
- Super-agent research, image generation, and agent-led revisions use credits like other super-agent work.
- Large or media-heavy decks may take longer to render.
- The preview can show a version while some downloadable formats are still being prepared.
- A single image or video file can be up to 64 MB. A deck with more than 12 MB of total asset files shows a size warning but can still be saved.
- If an editable PPTX looks slightly different on another computer, check for missing fonts first.
- Shared viewers may be able to present and download a deck without being able to edit its source.